Configuration
Create a new Webform
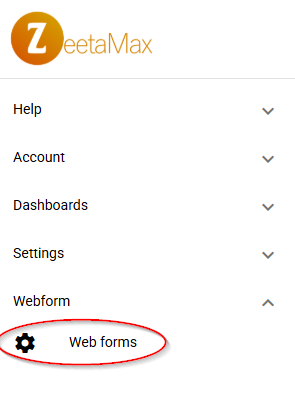
1. Open Webform from the ZeetaMax menu
Once you have subscribed to the Webform module, navigate to Webform → Web forms in the ZeetaMax sidebar.
2. Click "+ Create New Webform"
ZeetaMax supports multiple webforms, though most accounts only need one.

Configure your Webform
The webform editor opens with a Live Preview panel on the right that updates as you make changes. At the top you can set the Form Name and toggle the form on or off with the Enabled switch.
Configuration is split across six tabs: Fields, Layout, Defaults, Appearance, Settings, and Embed.
Fields
Choose which WorkflowMax records the form will create and which fields to include.
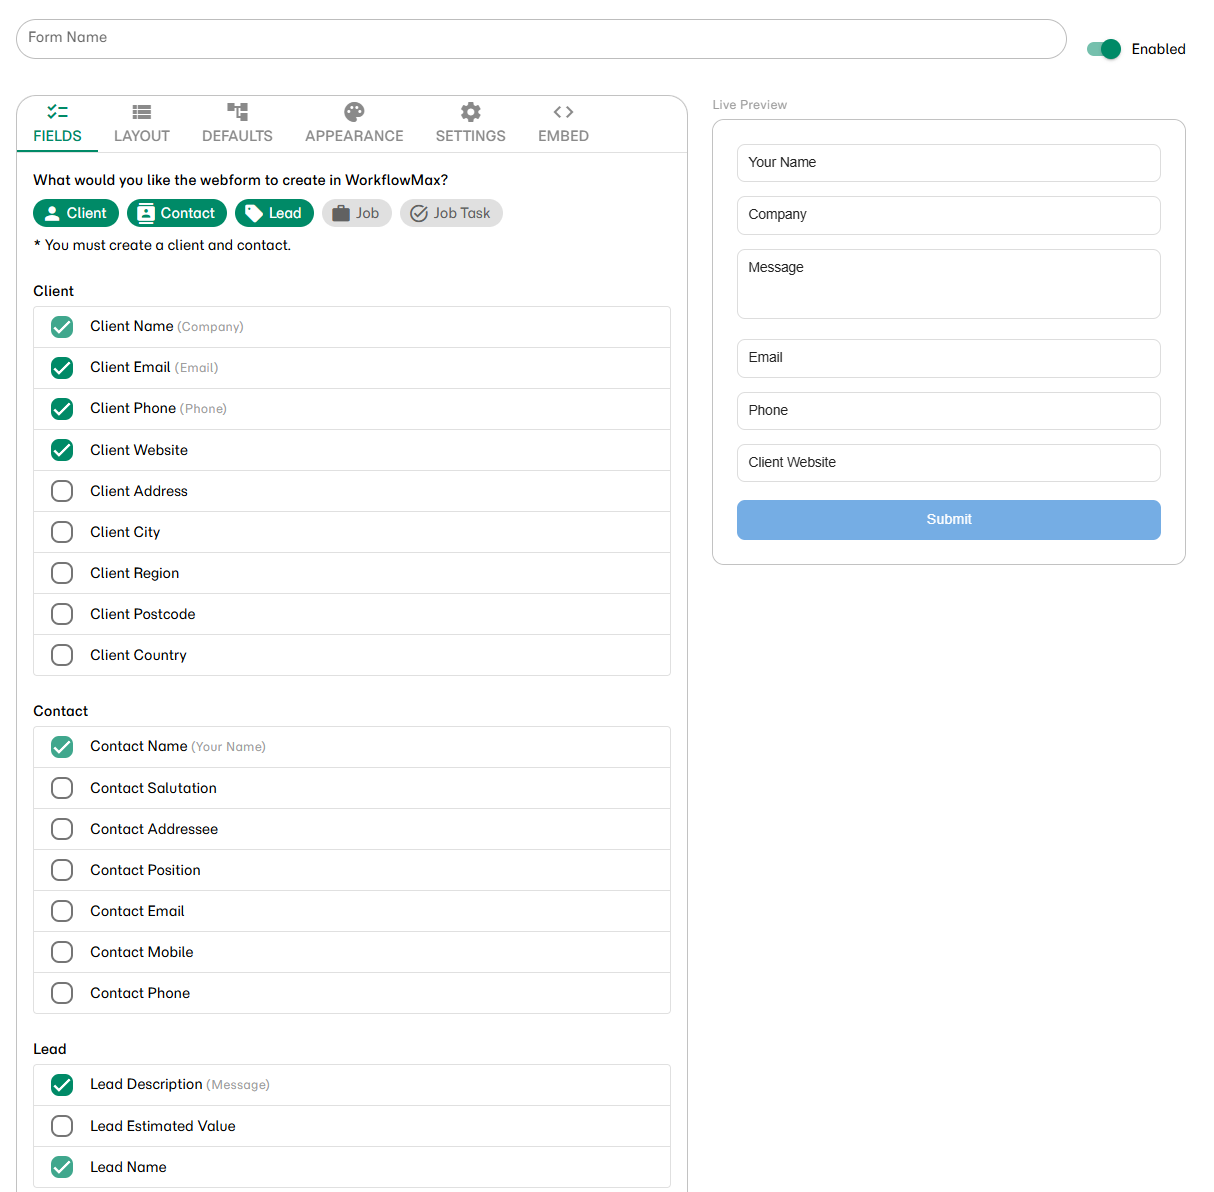
Record types
Select which records to create when a form is submitted. Client and Contact are required. Lead, Job, and Job Task are optional.
Field selection
Each enabled record type shows a list of its available fields. Check the fields you want to appear on the form. Required fields are already checked and cannot be removed. The label shown in parentheses (e.g. Client Name (Company)) is the default placeholder text that visitors will see. This is set on the Layout tab.
Layout
Arrange the order of fields and configure how each field is filled.
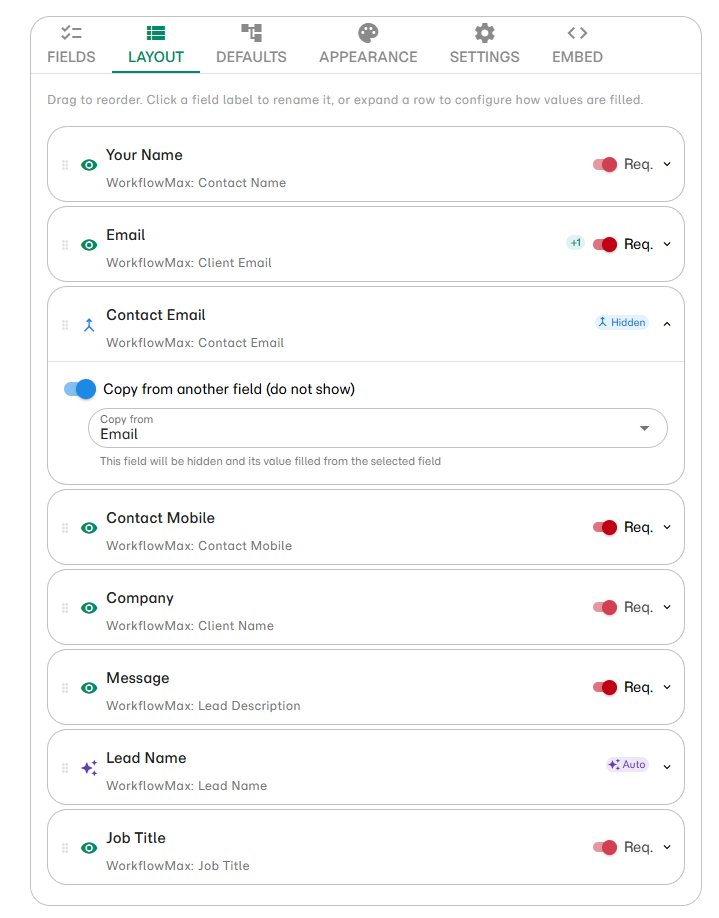
- Reorder — drag rows using the handle on the left to change the field order on the form.
- Rename — click a field label to edit the text shown to visitors.
- Expand a row to configure how the field value is populated:
- Required — mark the field as mandatory. Visitors will not be able to submit the form without completing it.
- Copy from another field — map one form input to multiple WorkflowMax fields. For example, a single Phone field can populate both Client Phone and Contact Phone.
- Generate Automatically — available for title fields (Lead Name, Job Title, etc.). ZeetaMax uses AI to generate an appropriate value from the message field content. Fields with this enabled show an Auto badge.
Defaults
Set backend values for WorkflowMax records that you don't want to expose to the visitor.
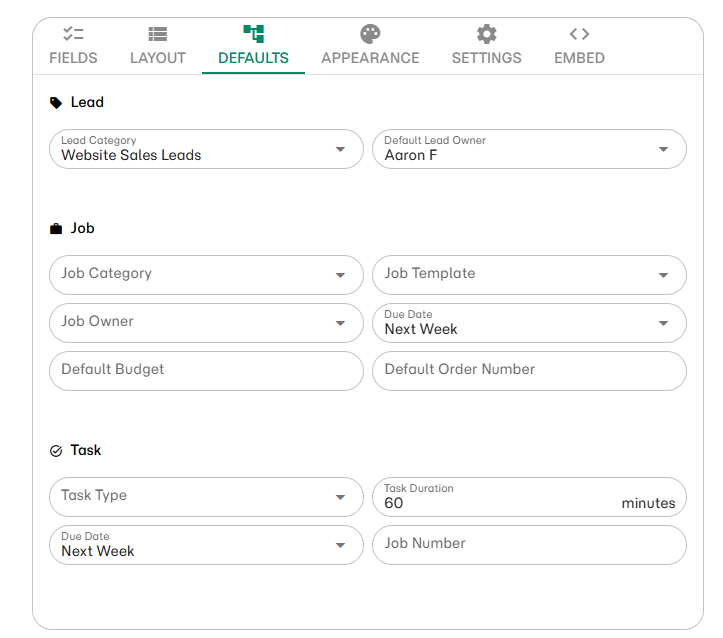
Sections are shown only for the record types you enabled on the Fields tab.
| Section | Fields |
|---|---|
| Lead | Lead Category, Default Lead Owner |
| Job | Job Category, Job Template, Job Owner, Due Date, Default Budget, Default Order Number |
| Task | Task Type, Task Duration (minutes), Due Date, Job Number |
Appearance
Control the visual presentation of the embedded form.
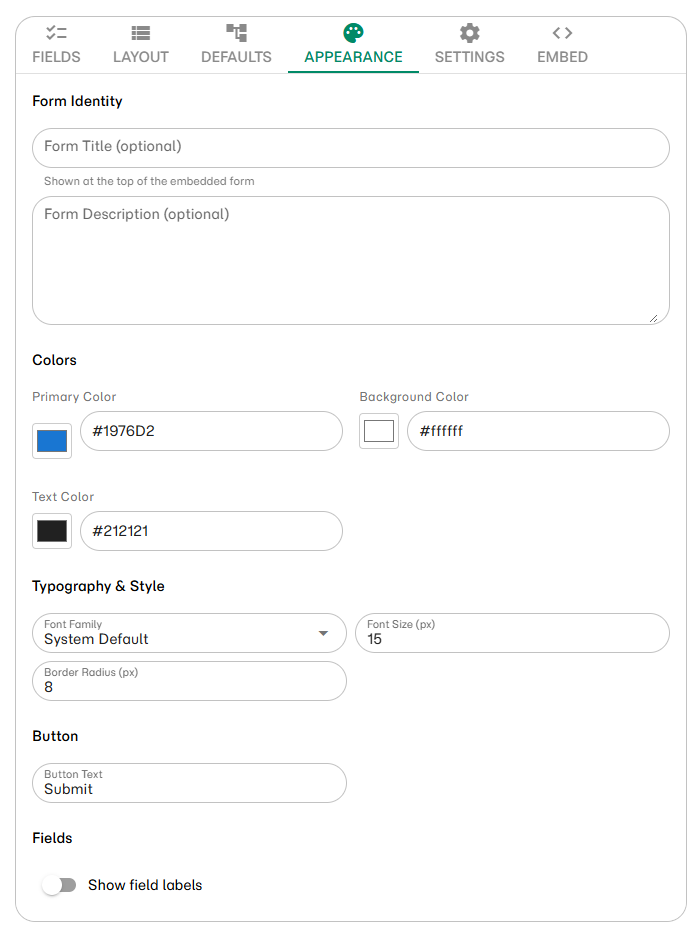
- Form Identity — optionally add a Form Title and Form Description shown at the top of the embedded form.
- Colors — set Primary Color, Background Color, and Text Color using hex values or the colour picker.
- Typography & Style — choose Font Family, Font Size (px), and Border Radius (px).
- Button — customise the submit button text (default: Submit).
- Fields — toggle Show field labels to display labels above each input. By default fields use placeholder text only.
Settings
Configure what happens after a visitor submits the form.
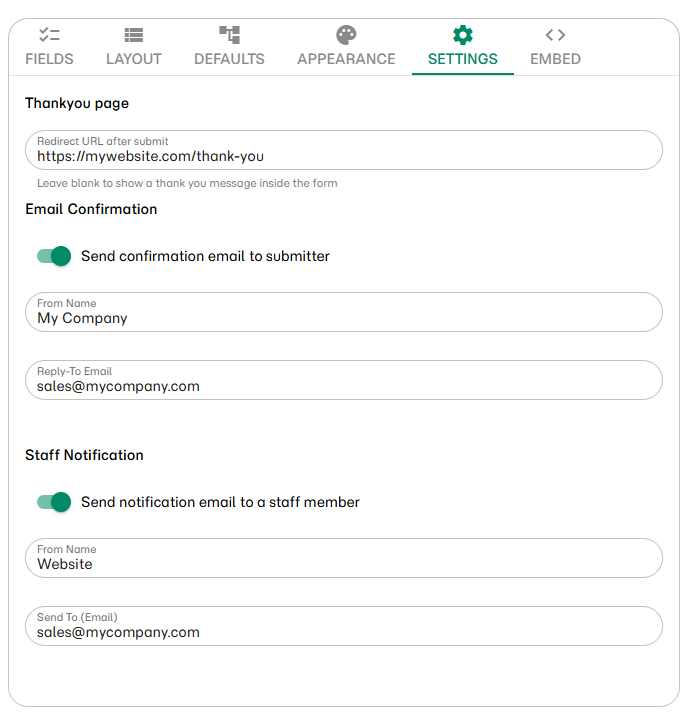
Thank you page
Enter a Redirect URL to send visitors to a specific page after submission (e.g. https://mywebsite.com/thank-you). Leave blank to display a thank you message inside the form itself.
Email Confirmation
Send an automatic confirmation email to the person who submitted the form.
| Field | Description |
|---|---|
| From Name | The name the email appears to come from |
| Reply-To Email | Where replies from the visitor will be directed |
Staff Notification
Send an internal notification email to a team member when a new submission arrives.
| Field | Description |
|---|---|
| From Name | The name shown on the notification email |
| Send To (Email) | The staff member's email address |
Embed
Add the form to your website using one of two methods.
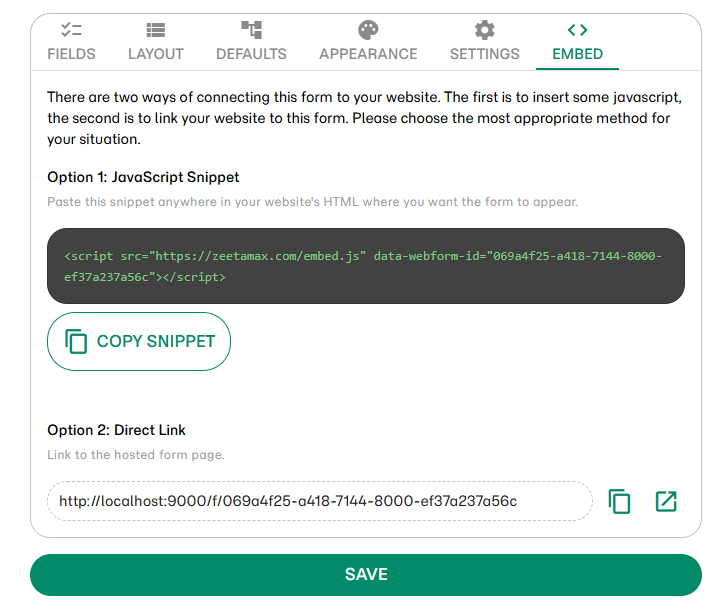
Option 1: JavaScript Snippet
Paste the generated <script> tag into your website's HTML at the location where you want the form to appear. The form will render inline and automatically receive any styling applied via the Appearance tab.
Option 2: Direct Link
Share or link to a ZeetaMax-hosted page containing just the form. Useful for email campaigns or when you cannot modify your website's HTML directly.
Click Copy Snippet or the copy icon next to the direct link to copy the value to your clipboard.